Springboot整合Freemarker的實現(xiàn)詳細過程
基本配置、測試
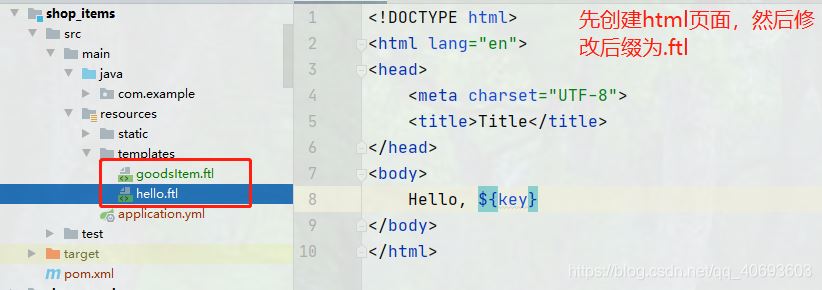
1、導入依賴<dependency> <groupId>org.springframework.boot</groupId> <artifactId>spring-boot-starter-freemarker</artifactId></dependency>2、準備一個Freemarker模板(.ftl)
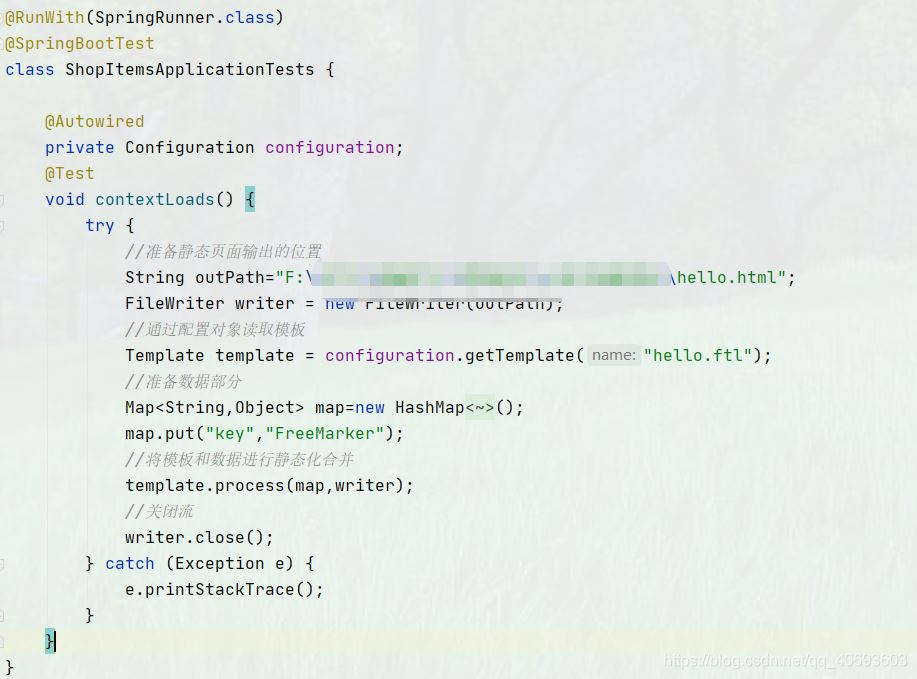
@Controller@RequestMapping('/goodItem')public class GoodItemController { @Reference private IGoodsService goodsService; @Autowired private Configuration configuration; @RequestMapping('/createHtml') @ResponseBody public String createHtml(int gid, HttpServletRequest request){ //通過商品id獲取商品詳情信息 Goods goods = goodsService.queryById(gid); String [] images=goods.getGimage().split('|'); //通過模板生成商品靜態(tài)頁面 try { //獲取商品詳情的模板對象 Template template = configuration.getTemplate('goodsItem.ftl'); //準備商品數(shù)據(jù) Map<String,Object> map=new HashMap<>(); map.put('goods',goods); map.put('context',request.getContextPath()); //freemarker頁面沒有分割功能,所以通過后臺將圖片分割后,將圖片數(shù)組傳到后臺 map.put('images',images); //生成靜態(tài)頁 //獲得classpath路徑 //靜態(tài)頁面的名稱必須和商品有所關聯(lián),最簡單的方式就是用商品的id作為頁面的名字 String path = this.getClass().getResource('/static/page/').getPath()+goods.getId()+'.html';; template.process(map,new FileWriter(path)); } catch (Exception e) { e.printStackTrace(); } return ''; }}
注意:1、freemarker頁面不能通過<base th:href='http://www.leifengta.com.cn/bcjs/${#request.getContextPath()+’/’}' rel='external nofollow' >獲得項目的根路徑。因此可從后臺將根路徑傳到前端,然后通過<base href='http://www.leifengta.com.cn/bcjs/${context}/' rel='external nofollow' />獲取。2、當page是一個空文件夾的時候,會報錯。這是因為maven項目不會對空文件夾進行打包編譯。
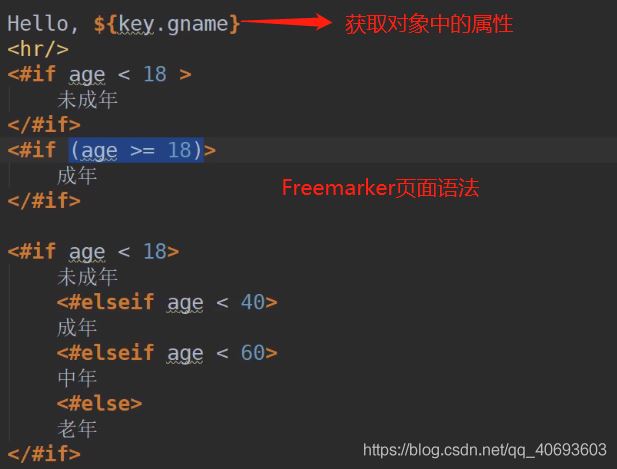
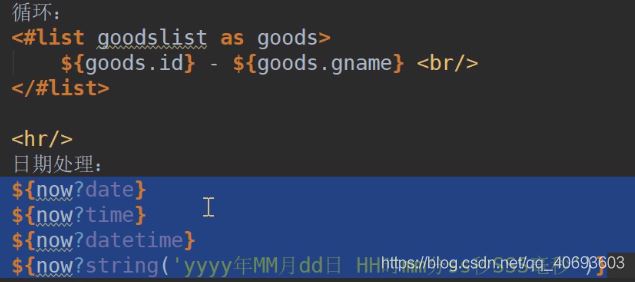
FreeMarker的基本語法
到此這篇關于Springboot整合Freemarker的實現(xiàn)詳細過程的文章就介紹到這了,更多相關Springboot整合Freemarker內容請搜索好吧啦網(wǎng)以前的文章或繼續(xù)瀏覽下面的相關文章希望大家以后多多支持好吧啦網(wǎng)!
相關文章:
 網(wǎng)公網(wǎng)安備